Wiring Tables
A Wiring Table is a node placed on the canvas next to a component that lists its wiring, one row per conductor ending on it. It is the same table the Wiring table export produces for that component, kept live on the canvas and drawn in the PDF export.
Wiring tables are especially useful on a formboard, where the person building the harness can read each connector’s pin-out right next to it.
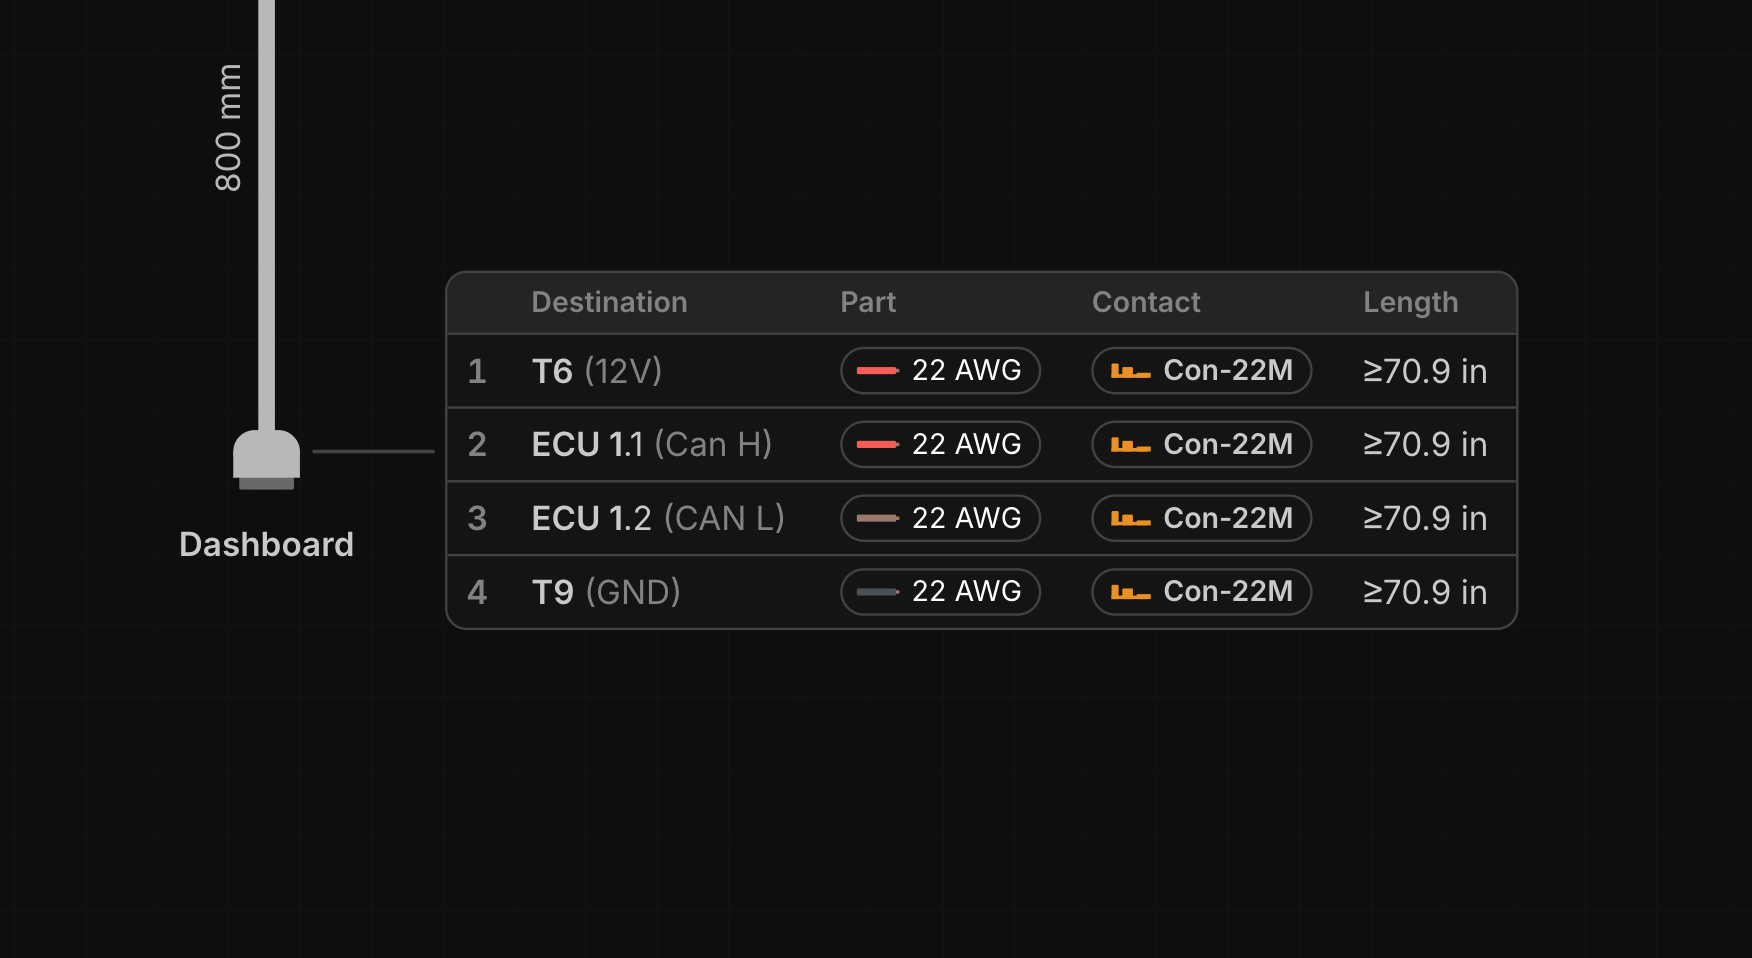
Showing a Wiring Table
right-click a Connector, Terminal, Splice, Diode or Resistor and select Show wiring table. The table appears beside the component, joined to it by a tether line.
Wiring tables are per view: showing one in the Layout view doesn’t show it in the Schematic view. Select several components to show tables for all of them at once.
Moving a Wiring Table
left-click-drag a wiring table to position it. It follows its component when the component moves, and belongs to the same group. Selecting a table highlights its component and the conductors it lists, and selecting a conductor highlights its rows.
Columns
right-click a wiring table and open the Columns submenu to choose which columns it shows. The table resizes to fit its content. The Cavity and Terminal columns are always shown.
| Column | Shows |
|---|---|
| Cavity | The cavity designation (connectors) |
| Terminal | Which side of the diode or resistor the conductor connects to |
| Signal | The cavity’s signal |
| Destination | The component and cavity at the other end of the conductor |
| Wire | The conductor’s component ID |
| Color | The wire or core colour, with stripe |
| Part | The assigned wire or cable part |
| Gauge | The conductor’s gauge |
| Contact | The contact or cavity plug in the cavity (connectors) |
| Twisted with | The other conductors this one is twisted with |
| Ident | The wire’s ident |
| Length | The conductor’s routed length |
Choose Reset to defaults to return to your default columns, which you can choose in Preferences.
Hide Empty Connections
right-click a wiring table and select Hide empty connections to drop the rows with nothing wired: empty cavities, N/C cavities and unwired sides.
Editing from a Wiring Table
The Destination, Part and Contact cells can be edited in place, with the same editors the component itself uses. Type in a destination cell to connect the cavity, or click a part cell to assign a different part.
Hiding a Wiring Table
right-click the table or its component and select Hide wiring table, or select the table and press Delete. Hiding a table never changes the wiring.